Amazon Web Services (AWS) is the world's most comprehensive and broadly adopted cloud platform, offering over 200 fully featured services from data centers globally, including computing, tools for the Internet of Things, developer tools, deployment, analytics, database, networking, etc. AWS is designed to allow application providers, ISVs, and vendors to quickly and securely host your applications – whether an existing application or a new SaaS-based application. Whether you are a small business or a big organization, you must be familiar with Amazon Web Services. The AWS Command Line Interface (CLI) is a unified tool to manage your AWS services.
Do you want to Get AWS Certified? Learn about various AWS Certification in detail
What is AWS CLI?
The AWS Command Line Interface (CLI) is a unified tool that manages the AWS services for you. You only have to download and configure one simple tool to control a plethora of AWS services. They are automated through scripts and help you implement a certain level of automation. It is indeed AWS CLI that makes AWS so dynamic and easy to use. For more information, learn more about Cloud Computing course.
AWS CLI allows users to interact with the resources in their AWS account in a programmatic way. Nowadays, AWS-Shell comes in handy and significantly boosts productivity. It supports auto-completion, fuzzy searching, and built-in documentation.
Following are some of the AWS Management Console from the command prompt which relevant to the terminal program:
- Linux shells – These shell programs such as bash, zsh, and tcsh to run commands in Linux or macOS.
- Windows command line – In Windows, we can run commands at the Windows command prompt or in PowerShell.
- Remotely – Here we can run commands on Amazon Elastic Compute Cloud (Amazon EC2) instances through a remote terminal program such as PuTTY or SSH, or with AWS Systems Manager.
How to Install AWS CLI?
Putting AWS CLI to use in your AWS involves a few steps.
- There are a few different ways to install it – you need to choose what works for your system.
- Every operating system has a different method of installation.
- Some generic steps are followed after the installation.
- Then comes the configuration.
- You will also need to upgrade it timely.
Follow these steps to successfully install and configure the AWS CLI for use.
Ways to Install:
You can effectively install the AWS Command Line Interface (AWS CLI) using:
- pip
- a virtual environment
- a bundled installer
What do you need?
- Unix, macOS, Linux, Windows
- Python 3 version 3.3+ or Python 2 version 2.6.5+
It is important to know that you may not be able to use an older version of Python with all AWS Services. Update to a newer version if there are Insecure Platform Warning or deprecation notices. To find out what version you currently have, visit:
https://github.com/aws/aws-cli/blob/master/CHANGELOG.rst.
1. Installing the AWS CLI Using pip
Pip is the main distribution method for the AWS CLI on macOS, Windows and Linux. It is a package manager for Python.
Installing the current AWS CLI Version
If you have pip and a supported version of Python, use the following command to install the AWS CLI. Use the pip3 command if you have Python version 3+ installed:
$ pip3 install awscli --upgrade –user
The --upgrade option commands pip3 to upgrade the requirements that are already installed. The --user option commands pip3 to install the program to a subdirectory of the user directory. Doing this avoids the complication of modifying libraries used by your operating system.
Upgrading to the latest version
Use the pip list -o command to identify packages that are "outdated”:
$ aws --version
aws-cli/1.16.170 Python/3.7.3 Linux/4.14.123-111.109.amzn2.x86_64 botocore/1.12.160

$ pip3 list -o

Package    Version      Latest        Type
----------     --------      --------        -----
awscli       1.16.170    1.16.198   wheel
botocore   1.12.160    1.12.188   wheel
Now, run pip install --upgrade to get the latest version:
$ pip3 install --upgrade --user awscli
Collecting  aws cli
Downloadinghttps://files.pythonhosted.org/packages/dc/70/b32e9534c32fe9331801449e1f7eacba6a1992c2e4af9c82ac9116661d3b/awscli-1.16.198-py2.py3-none-any.whl (1.7MB)
     |████████████████████████████████| 1.7MB 1.6MB/s
Collecting botocore==1.12.188 (from awscli)
Using cached https://files.pythonhosted.org/packages/10/cb/8dcfb3e035a419f228df7d3a0eea5d52b528bde7ca162f62f3096a930472/botocore-1.12.188-py2.py3-none-any.whl
Requirement already satisfied, skipping upgrade: docutils>=0.10 in ./venv/lib/python3.7/site-packages (from awscli) (0.14)
Requirement already satisfied, skipping upgrade: rsa<=3.5.0,>=3.1.2 in ./venv/lib/python3.7/site-packages (from awscli) (3.4.2)
Requirement already satisfied, skipping upgrade: colorama<=0.3.9,>=0.2.5 in ./venv/lib/python3.7/site-packages (from awscli) (0.3.9)
Requirement already satisfied, skipping upgrade: PyYAML<=5.1,>=3.10; python_version != "2.6" in ./venv/lib/python3.7/site-packages (from awscli) (3.13)
Requirement already satisfied, skipping upgrade: s3transfer<0.3.0,>=0.2.0 in ./venv/lib/python3.7/site-packages (from awscli) (0.2.0)
Requirement already satisfied, skipping upgrade: jmespath<1.0.0,>=0.7.1 in ./venv/lib/python3.7/site-packages (from botocore==1.12.188->awscli) (0.9.4)
Requirement already satisfied, skipping upgrade: urllib3<1.26,>=1.20; python_version >= "3.4" in ./venv/lib/python3.7/site-packages (from botocore==1.12.188->awscli) (1.24.3)
Requirement already satisfied, skipping upgrade: python-dateutil<3.0.0,>=2.1; python_version >= "2.7" in ./venv/lib/python3.7/site-packages (from botocore==1.12.188->awscli) (2.8.0)
Requirement already satisfied, skipping upgrade: pyasn1>=0.1.3 in ./venv/lib/python3.7/site-packages (from rsa<=3.5.0,>=3.1.2->awscli) (0.4.5)
Requirement already satisfied, skipping upgrade: six>=1.5 in ./venv/lib/python3.7/site-packages (from python-dateutil<3.0.0,>=2.1; python_version >= "2.7"->botocore==1.12.188->awscli) (1.12.0)
Installing collected packages: botocore, awscli
Found existing installation: botocore 1.12.160
Uninstalling botocore-1.12.160:
Successfully uninstalled botocore-1.12.160
Found existing installation: awscli 1.16.170
Uninstalling awscli-1.16.170:
Successfully uninstalled awscli-1.16.170
Successfully installed awscli-1.16.198 botocore-1.12.188
2. Installing the AWS CLI in a Virtual Environment
Another option is to install the AWS CLI in a virtual environment to separate the tool and its dependencies. You can also use a different Python version for this purpose.
3. Installing the AWS CLI Using an Installer
Use the bundled installer for automated and offline installation on Unix, macOS, and Linux. It includes the AWS CLI, its dependencies, and a shell script that is responsible for the installation. For Windows, try MSI installer. Both these methods simplify the initial installation.
Installation of Linux or Unix
Both the platforms have identical installation process. You need to have Python’s latest version. We recommend using the bundled installer for this. The steps are as follows:
1. To begin the installation:
curl "https://s3.amazonaws.com/aws-cli/awscli-bundle.zip" -o "awscli-bundle.zip"
2. Unzip the downloaded package:
unzip awscli-bundle.zip
3. Run the installation:
sudo ./awscli-bundle/install -i /usr/local/aws -b /usr/local/bin/aws
Using the -b option allows you to use the AWS CLI from any directory.
Installation on Amazon Linux
The AWS Command Line Interface comes preinstalled on both Amazon Linux and Amazon Linux 2. Below are the steps to install:
1. Identify currently installed version:
$ aws --version
aws-cli/1.16.116 Python/3.6.8 Linux/4.14.77-81.59.amzn2.x86_64 botocore/1.12.106
2. Use pip3 to install the latest version of the AWS CLI. If you run the command from within a Python virtual environment (venv), then you don't need to use the --user option.
$ pip3 install --upgrade --user awscli
3. Add the install location to the beginning of the PATH variable.
$ export PATH=/home/ec2-user/.local/bin:$PATH
4. Verify that you're running new version with aws --version.
$ aws --version
aws-cli/1.16.116 Python/3.6.8 Linux/4.14.77-81.59.amzn2.x86_64 botocore/1.12.106
Installation on Windows
The AWS Command Line Interface can be installed on Windows by using a standalone installer or through a pip - a package manager for Python
> Through Installer
- Download the appropriate MSI installer.
- Run the downloaded MSI installer or the setup file.
- Follow these instructions:
By default, the CLI installs to C:\Program Files\Amazon\AWSCLI (64-bit version) or C:\Program Files (x86)\Amazon\AWSCLI (32-bit version). To confirm the installation, use the aws --version command at a command prompt (open the Start menu and search for cmd to start a command prompt).
C:\> aws --version
aws-cli/1.16.116 Python/3.6.8 Windows/10 botocore/1.12.106
If Windows is unable to find the program, you might need to close and reopen the command prompt to refresh the path, or add the installation directory to your PATH environment variable manually.
> Through Pip
1. Open Start menu→Command Prompt
2. Verify that both Python and pip are installed correctly:
C:\> python --version
Python 3.7.1
C:\> pip3 --version
pip 18.1 from c:\program files\python37\lib\site-packages\pip (python 3.7)
3. Install AWS CLI via pip
C:\> pip3 install awscli
4. Check if the installation went right
C:\> aws --version
aws-cli/1.16.116 Python/3.6.8 Windows/10 botocore/1.12.106
To upgrade to the latest version:
C:\> pip3 install --user --upgrade awscli
Installation on Mac OS
> Through Installer
1. Download the AWS CLI Bundled Installer
$ curl "https://s3.amazonaws.com/aws-cli/awscli-bundle.zip" -o "awscli-bundle.zip"
2. Unzip the package
$ unzip awscli-bundle.zip
3. Run the installation
$ sudo ./awscli-bundle/install -i /usr/local/aws -b /usr/local/bin/aws
This command installs the AWS CLI to /usr/local/aws and creates the symlink aws in the /usr/local/bin directory. Using the -b option to create a symlink eliminates the need to specify the install directory in the user's $PATH variable. It enables users to run the AWS CLI by typing “aws” from any directory.
If you want to see an explanation of the -i and -b options, use the -h option
$ ./awscli-bundle/install -h
the commands summarized for easy cut and paste at the command line.
curl "https://s3.amazonaws.com/aws-cli/awscli-bundle.zip" -o "awscli-bundle.zip"
unzip awscli-bundle.zip
sudo ./awscli-bundle/install -i /usr/local/aws -b /usr/local/bin/aws
> Through PIP
1. Download and install the latest version of Python from Python.org.
2. Download and run the pip3 installation script provided by the Python Packaging Authority
$ curl -O https://bootstrap.pypa.io/get-pip.py
$ python3 get-pip.py --user
3. Use pip3 to install the AWS CLI. We recommend using the pip3 command if you use Python version 3+
$ pip3 install awscli --upgrade --user
4. See if AWS CLI is installed correctly
$ aws --version
AWS CLI 1.16.116 (Python 3.6.8)
To upgrade to the latest version, run the command:
$ pip3 install awscli --upgrade --user
Installation on Ubuntu
> Through APT Package Manager
1. Update the package repository cache
$ sudo apt-get update
2. Install AWS CLI with the following command
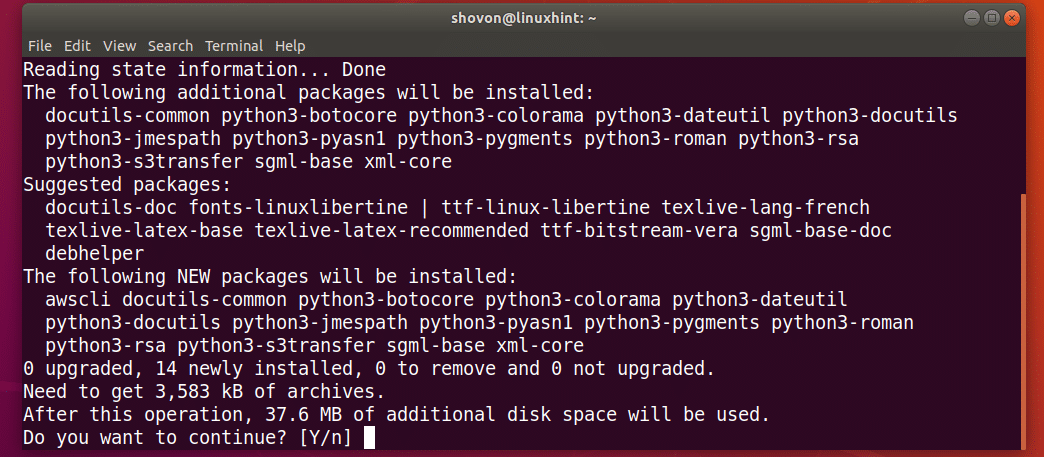
$ sudo apt-get install awscli
press y and then press <Enter> to continue. Your screen should look something like this:
3. Now that it’s installed, check if it’s working properly or not
$ aws --version
> Through PIP
AWS CLI being a Python module itself makes it easy for users who install it through PIP to update it on a regular basis. Assuming you have Python 3, follow the below steps to install:
1. Install Python PIP with the following command
$ sudo apt-get install python3-pip
Press y and then press <Enter> to continue
2. Install AWS CLI using PIP with the following command
$ pip3 install awscli --upgrade --user
3. Run AWS CLI with the following command
$ python3 -m awscli --version
After Installation
After you have successfully installed AWS CLI, you need to set the Path to Include the AWS CLI in your system.
> LINUX
Find out the folder in which pip installed the AWS CLI
$ which aws
/home/username/.local/bin/aws
You can reference this as “~/.local/bin/” because of the reason that “/home/username” corresponds to ~ in Linux OS
In case you don't know where Python is installed, run this command
$ which python
/usr/local/bin/python
If this is the same folder you added to the path while installing pip, there’s nothing else to be done. Otherwise, perform those same steps again, adding this additional folder to the path.
> WINDOWS
The Windows System PATH tells your PC where it can find specific directories:
C:\> where aws
C:\Program Files\Amazon\AWSCLI\bin\aws.exe
Find out where the aws program is installed
C:\> where c:\ aws
C:\Program Files\Python37\Scripts\aws
If the command returns the following error, then it is not in the system PATH and you can't run it by typing its name.
C:\> where c:\ aws
INFO:Could not find files for the given pattern.
In that case, you need to add the path manually. First, you need to search where it is installed on your computer:
C:\> where /R c:\ aws
c:\Program Files\Amazon\AWSCLI\bin\aws.exe
c:\Program Files\Amazon\AWSCLI\bincompat\aws.cmd
c:\Program Files\Amazon\AWSCLI\runtime\Scripts\aws
c:\Program Files\Amazon\AWSCLI\runtime\Scripts\aws.cmd
...
To modify your PATH variable (Windows)
- Press the Windows key and enter environment variables.
- Choose the Edit environment variables for your account.
- Choose the PATH →Edit.
- Add the path to the Variable value field. For example: C:\new\path
- Click OK twice to apply the new settings.
- Close any running command prompts and reopen the command prompt window.
> MAC OS
Locate Python
$ which python
/usr/local/bin/python
The output might be the path to a symlink, not the actual program. Run ls -al to see where it points.
$ ls -al /usr/local/bin/python
~/Library/Python/3.7/bin/python3.6
Pip install programs in the same folder as the Python application. Add this folder to your PATH variable.
To modify the PATH variable for macOS (and Linus or Unix):
1. Find the shell profile script in the user folder. In case you don’t know which shell you have, run echo $SHELL
2. Through the following, add an export command to the profile script
export PATH=~/.local/bin:$PATH
This adds a path, ~/.local/bin in this example, to the current PATH variable.
3. The updated profile can now be loaded into your current session
$ source ~/.bash_profile
AWS CLI Commands
$ aws help
This command will list out the possible combinations of aws key terminologies that we can use in the terminal(AWS CLI).
$ aws ec2 describe-instances
This command is used to list all instances which is in the particular aws account through pagination technique.
$ aws configure --profile profilename
This command is used to create and configure profiles in aws.
$ aws configure output format {json, yaml, yaml-stream, text, table}
This command will helps to structure the output in a prescribed format.
$ aws configure region (region-name)
This command is to configure the region for the respective instance that we need.
Advantages of Using AWS CLI
- Easier to install and setting up multiple devices in a parallel manner.
- Supports all Amazon Web Services. Previously, you needed a dedicated CLI tool for just the EC2 service.
- Saves time through configuring and handling multiple devices.
- Scripting.
Looking to boost your ITIL skills? Explore our unique online ITIL training courses. Enhance your knowledge and stay ahead in the ever-evolving IT industry. Join now!
Conclusion
AWS Command Line Interface (AWS CLI) v2 is now available for download over IPv6 connections. You can download the AWS CLI v2 installers for IPv6-only environments, such as Amazon EC2 running inside an IPv6-only Amazon Virtual Private Cloud. Previously, the AWS CLI v2 installation packages were only available to download over IPv4 connections. The AWS CLI v2 installation packages can be downloaded using the existing installation instructions.
For example, to download the latest AWS CLI v2 Linux installer run the following command over an IPv4 or IPv6 connection:
curl "https://awscli.amazonaws.com/awscli-exe-linux-x86_64.zip" -o "awscliv2.zip"
We hope the blog helps you better understand AWS Command Line Interface.
You May Also Like:
5 Essential AWS Tools of 2023
Google Cloud vs. AWS: 2023 Comparison
Future of AWS: Trends & Predictions
AWS Cheat Sheet: Complete Guide (2023)
How to Get Free AWS Credits in 2023?
AWS Job Description: Examples & Templates
AWS Mindmap Completed Guide 2023
Top AWS Careers & Job Opportunities in 2023
How to Build an Effective AWS Resume in 2023?
7 Must-Have AWS Skills for 2023
AWS CLI: Frequently Asked Questions
Does AWS CLI use https?
AWS CLI sends requests to AWS services using HTTPS on TCP port 443. Users must be able to make outbound connections on TCP port 443 to use the AWS CLI successfully.
How do I know if AWS CLI is configured?
AWS Config can be used to check whether it has started recording the configurations of the supported AWS resources in your account by using the describe-configuration-recorder-status command. Specified delivery channels receive the recorded configurations.
What output formats does AWS CLI support?
The AWS CLI supports the following output formats:
- json – The output is formatted as a JSON string.
- yaml – The output is formatted as a YAML string.
- yaml-stream – The output is streamed and formatted as a YAML string.


.png&w=3840&q=75)


