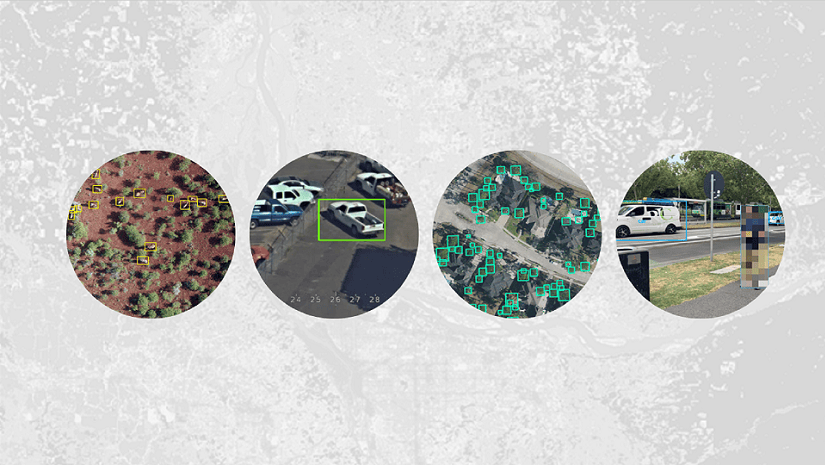
Welcome to a two-part blog series on creating and using training data to build object detection models using deep learning. In this first part, we will focus on labeling objects on images. In the second part, we will delve into preparing and using training samples to train the best possible model. By the end of this series, you will have a comprehensive understanding of how to create and leverage high-quality training samples to build object detection models using the deep learning tools available in ArcGIS.
Image labeling is one of the most important aspects of creating high-quality training data. Image labeling involves identifying and bounding all objects of interest in an image. This can be a time-consuming process, but it is essential for training accurate object detection models.
Here are our top six tips to label training samples on images for object detection:
1. Use unique labels classes for different objects
Use unique label classes for each different object type. For example, when creating a model to detect vehicles, you might initially find it convenient to merge all types under the label “vehicles. But if you need to tell apart cars, vans, and trucks, you’ll have to change all “vehicle” labels to the specific type.

2. Use tight bounding boxes
Draw bounding boxes tightly around the objects of interest. This helps the model accurately learn the object’s shape and location. Avoid unnecessary background or empty space within the bounding box.

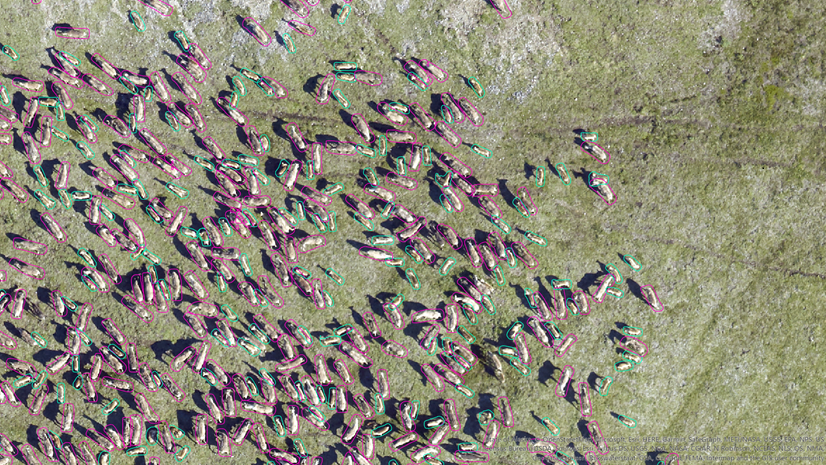
3. Label all objects of interest in all images
Label all objects of interest present in all images that are going to be used for training the model. For instance, we have 10 images that contain 200 cars. If we label all the cars on 5 images or some of the cars on all 10 images, we are not training the model properly, since we are leaving some of the cars unlabeled. Training the model with such data will make it prone to false negatives. False negatives occur when the model fails to detect all objects that are present in the image.

4. Label occluded objects as if they are fully visible
Usually, people draw bounding boxes around the visible parts only when dealing with partially visible or truncated objects. People may use different approaches depending on the specific model they are using. However, we see better detections when we label occluded objects as if they are fully visible. For example, if you are training a model to detect cars, and you have an image of a car that is partially occluded by a tree, you should label the entire car, even though the tree is blocking some of it. This will help the model to learn that the car is still there, even though it is not fully visible.

5. Use multiple labels for ambiguous objects
When dealing with ambiguous objects, use multiple labels to capture the different interpretations or categories that can apply to those objects. Ambiguous objects are those that can be labeled differently based on context or subjective interpretation. By assigning multiple labels, you provide the model with more information and increase its ability to handle such ambiguity. For example, consider the image below where it is difficult to decide if the vehicle is a truck or a car. In this case, it is beneficial to assign both labels to the object, allowing the model to learn the different interpretations.

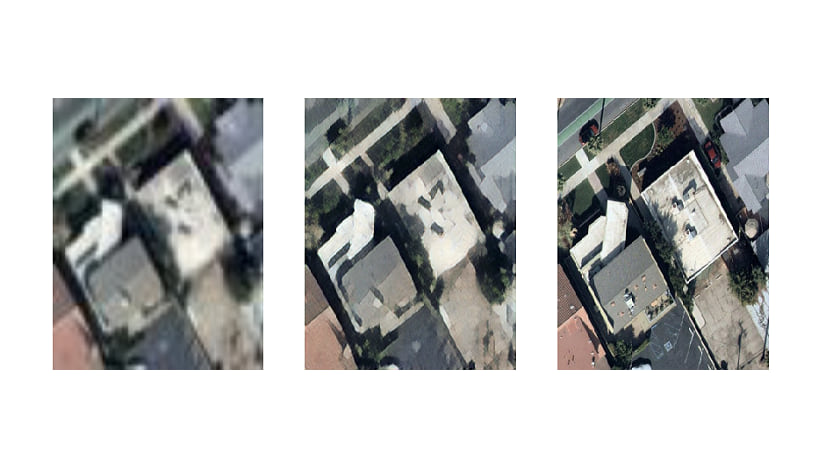
6. Quality and quantity of samples
The number of samples required for training a model can vary depending on several factors, including the complexity and context of the objects being detected, the specific deep learning architecture being used, and the desired level of accuracy. To make your model work in most cases, include samples representing different appearances, scales, occlusions, view angles, and light conditions.
We cannot determine the exact number of samples needed with a fixed rule. However, you can start with about 150-500 labels per object class and examine the various model quality metrics such as precision, recall, false positives, false negatives. Based on this initial review, decide how many more training samples you may need. Most models are trained with at least a couple of thousands of training samples. To determine the optimal amount of training data, try different amounts and evaluate your model’s performance on the validation and test sets.
Conclusion
By following these tips, you can create high-quality labels for training samples that will help you to train an effective object detection model. In the next part of this blog series, we will discuss tips for preparing and using training samples for object detection. Stay tuned!
About the author


Article Discussion: