
The rise of JavaScript frameworks such as React opened a new possibility in the world of Single Page Applications (SPAs). It became a lot easier to develop reusable components and create robust applications with JavaScript. However, as the applications grew, there arose a complexity – state management. That’s why we’ll discuss about how to Manage State in a React Application Using Redux.
Developers ran into issues of having to pass state as props through components that are not even using the props, which is referred to as prop drilling. The mentioned scenario would come to the rescue if we the said components had a parent-child relationship. What about components that are not in any way in the same hierarchy but need to share the same state? Another fix would have been to raise the state to a shared parent component and then apply prop drilling.
What Is State Management?
State management offers a much cleaner and more organized way of handling component states by managing the state of the whole application from one central place. State management ranges from simple solutions such as Context API to more complex solutions such as Redux. Sometimes using a solution such as Redux might be overkill for small applications but is very beneficial for large applications.
What Is Redux?
Redux is a state management library that treats the data of JavaScript applications as immutable and only creates shallow copies hence preventing re-rendering of the application as a performance boost. Redux boasts of a large ecosystem and also a robust Redux Toolkit that helps in simplification of tasks such as initial setup and addition of new elements.
Hands-On
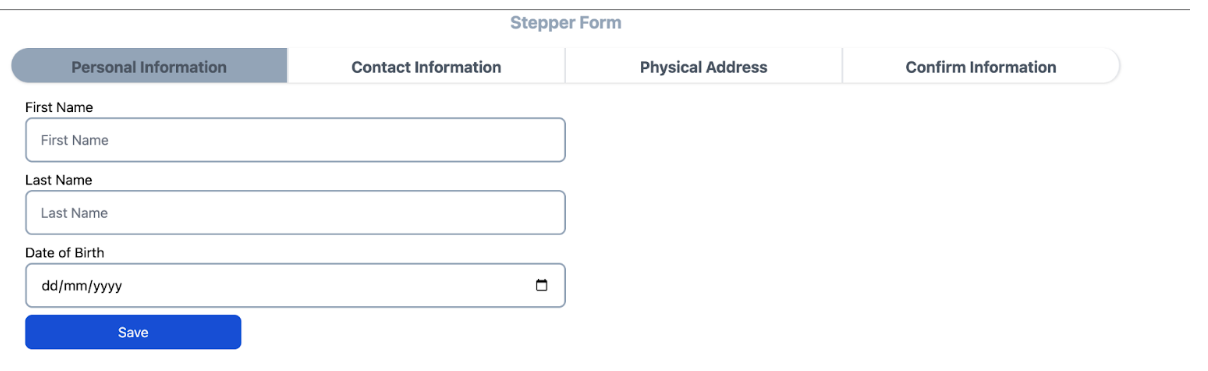
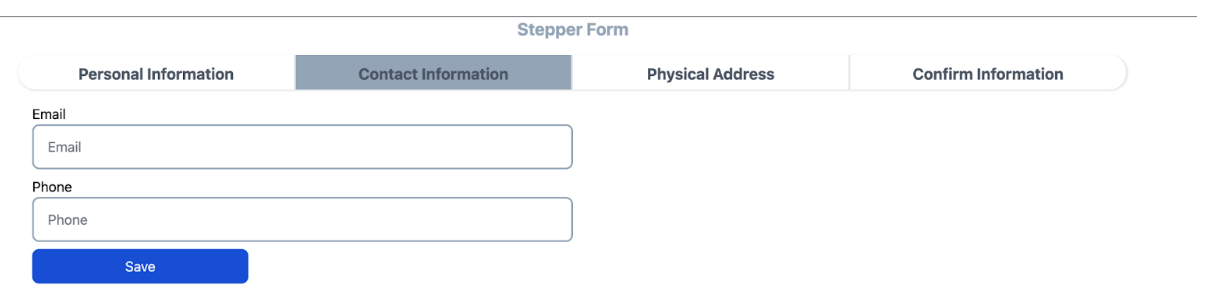
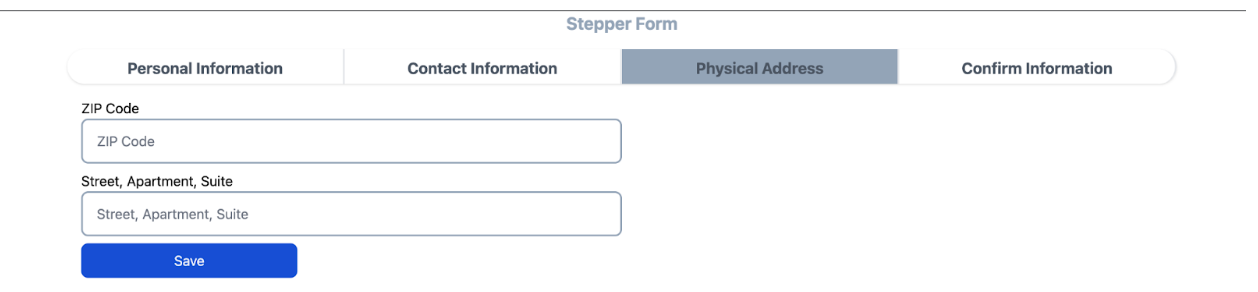
In this blog, we are going to use a simple stepper form which consists of four lazy-loaded forms. These forms all together constitute one data object even though they are rendered separately. Typically these are four components or steps mentioned below share the same state yet not in the same hierarchy.
Step One:
Step two:
Step three:
Step four:

The typical behavior of the above stepper form is that, once you fill in the first step and navigate to the second step, you will lose all the input in the first step. We shall solve this using Redux state management. When the save button is clicked, it will call the dispatch hook to save the form to the state so that if you navigate back to a previous tab, you will find the information.
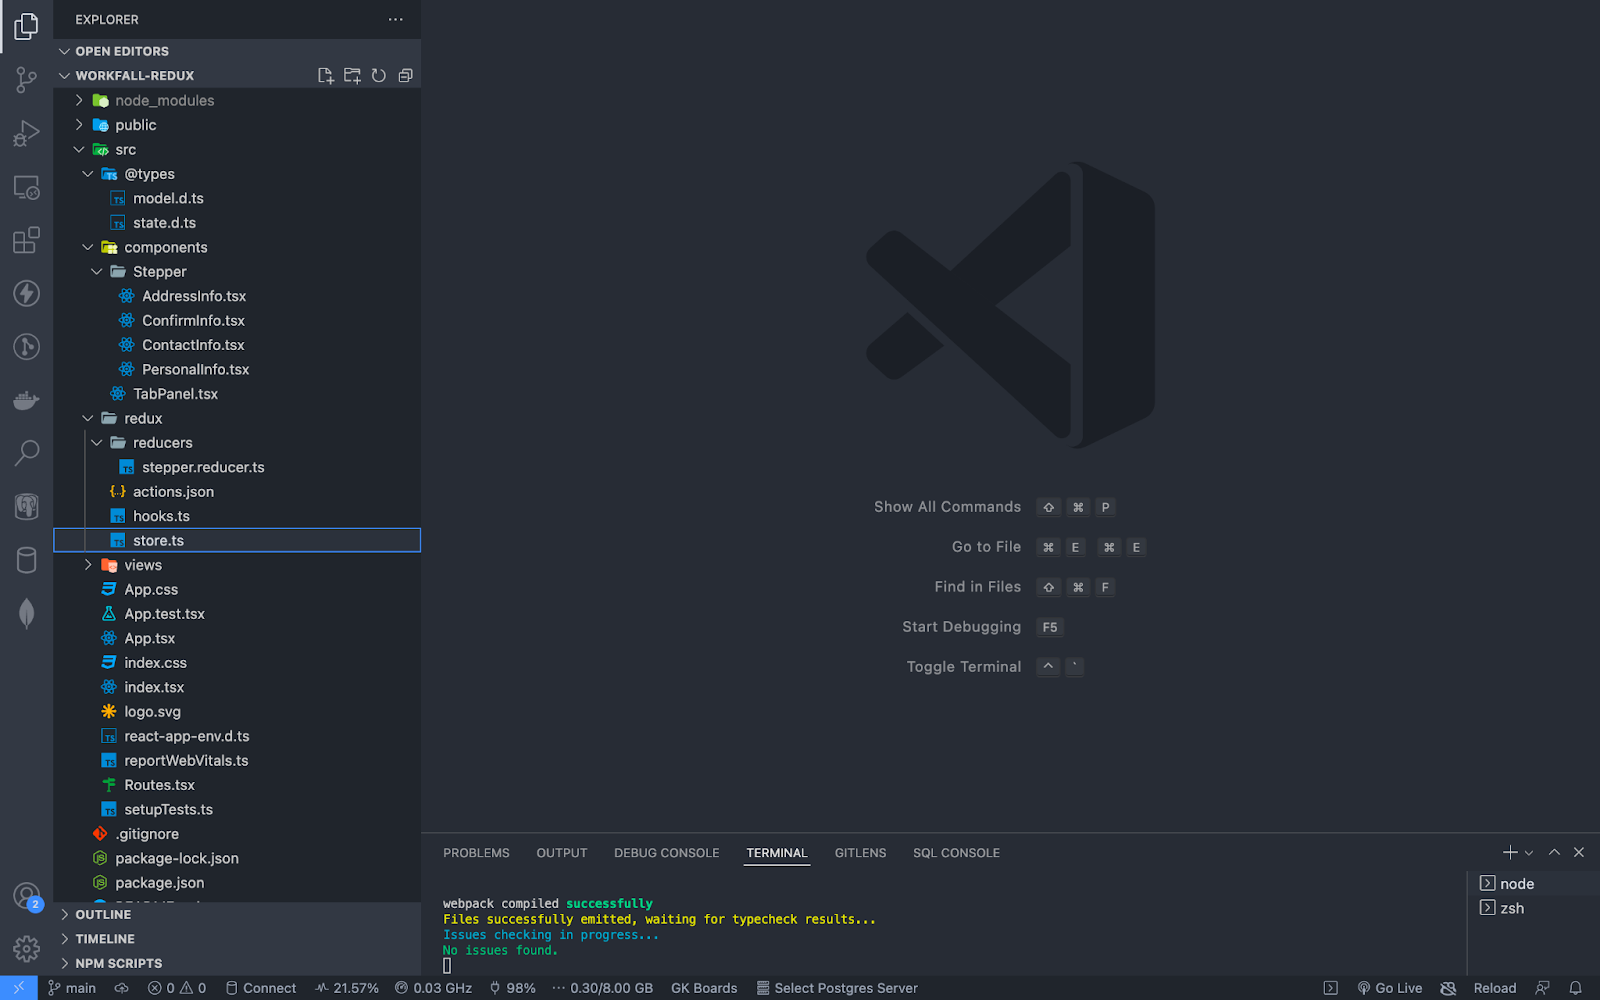
Let us begin with the coding then. Refer to the folder structure shown below to get started:
Installations
For this project, we will be using Tailwind CSS. To install and configure Tailwind CSS kindly follow the guide written here: https://tailwindcss.com/docs/installation. One more tailwind plugin for the forms is needed which can be installed with the yarn add -D @tailwindcss/forms command and then add it to the plugins in the tailwind.config.js file.
tailwind.config.js:

To install Redux, we shall use the yarn add react-redux @reduxjs/toolkit command.
We shall also use the useForm library to manage all our form inputs and data. Use the yarn add react-hook-form to install the package.
Data Modelling
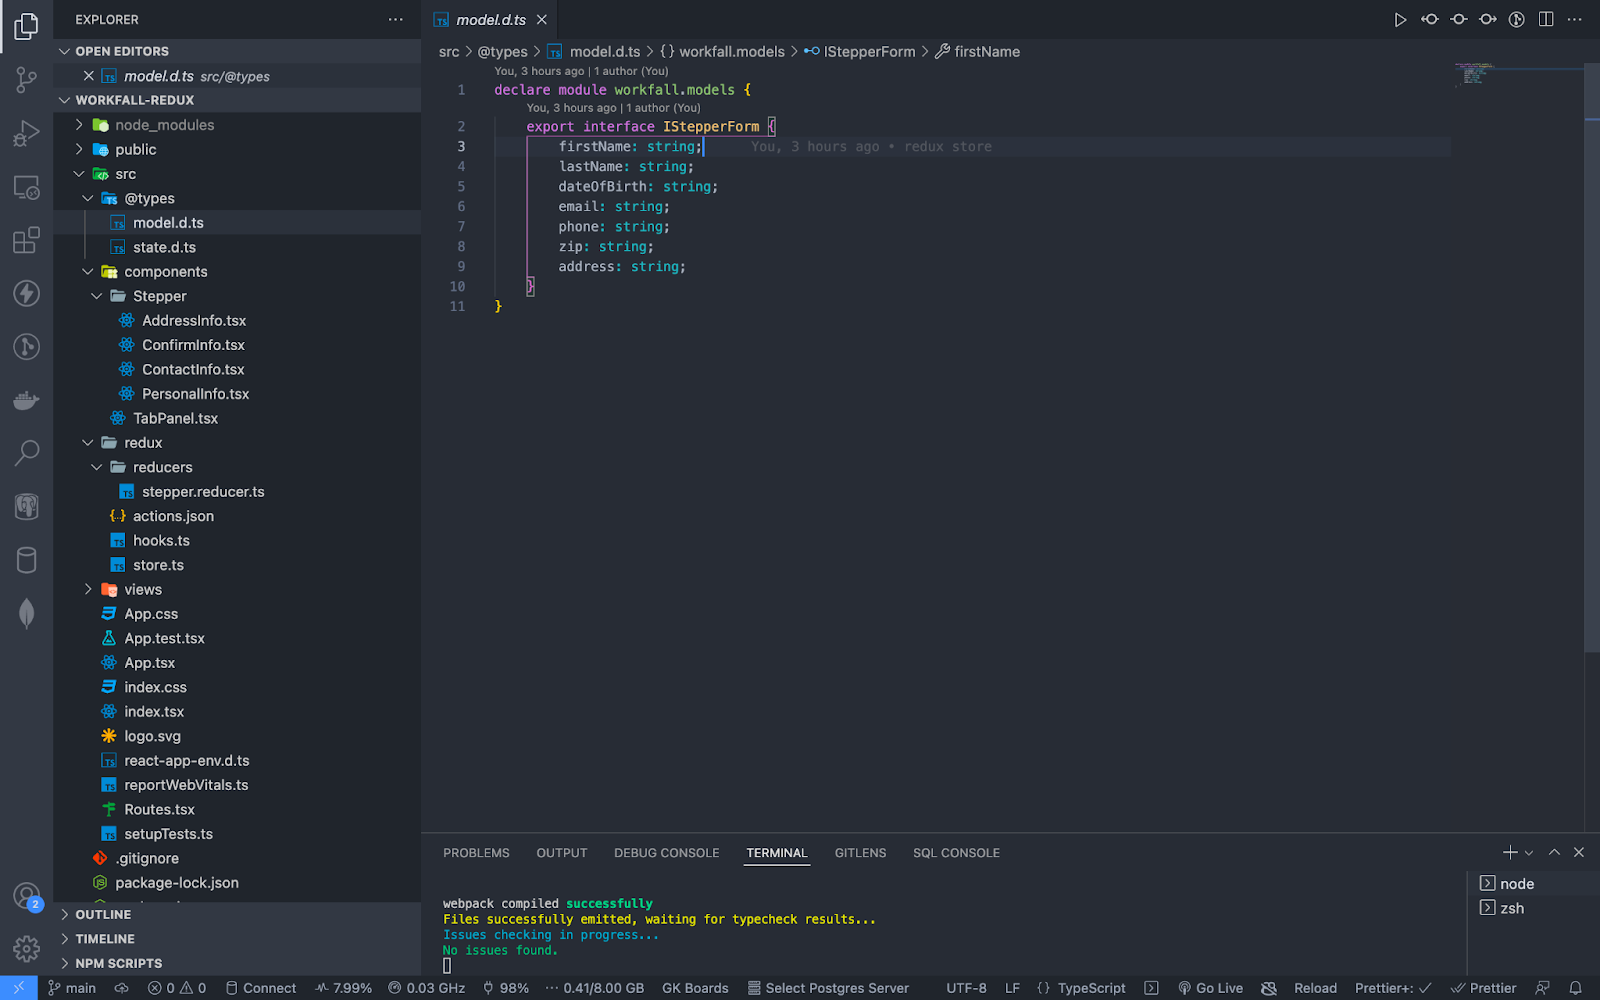
We shall start by writing type definitions for the models and the state. In the src folder create a folder and name it @types inside it add two files model.d.ts and state.d.ts.
model.d.ts:
state.d.ts:

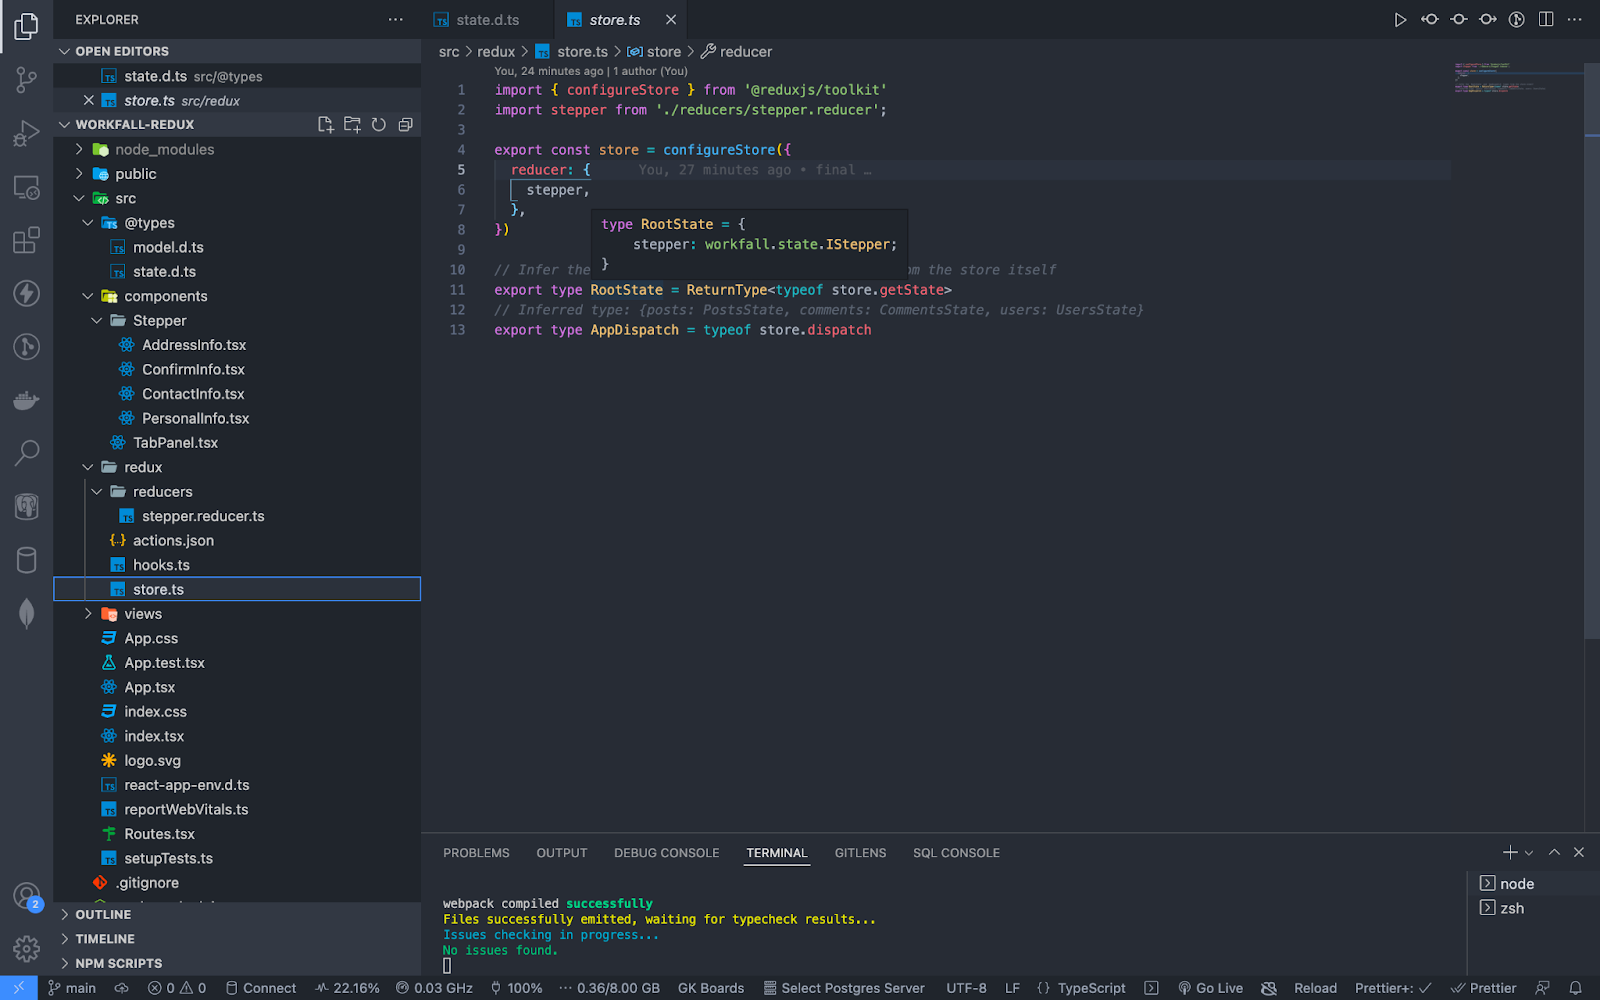
Configuring the store
Start by creating a folder named redux in the src folder. Note that this naming is just by convention. Inside the redux folder we shall have a reducers folder and actions.json, hooks.ts and store.ts files.
store.ts:
We configure the store by bootstrapping all the reducers. Since we are using TypeScript, we are inferring the types so that we do not have to manually update the types every time we add a new reducer.
hooks.ts:
To prevent circular import dependency, we define all our Redux hooks in one file.

reducers/stepper.reducer.ts:
The reducer is where all the data processing takes place to create the new state from the previous. Each time an action is dispatched, the reducer receives the event and produces the desired output.

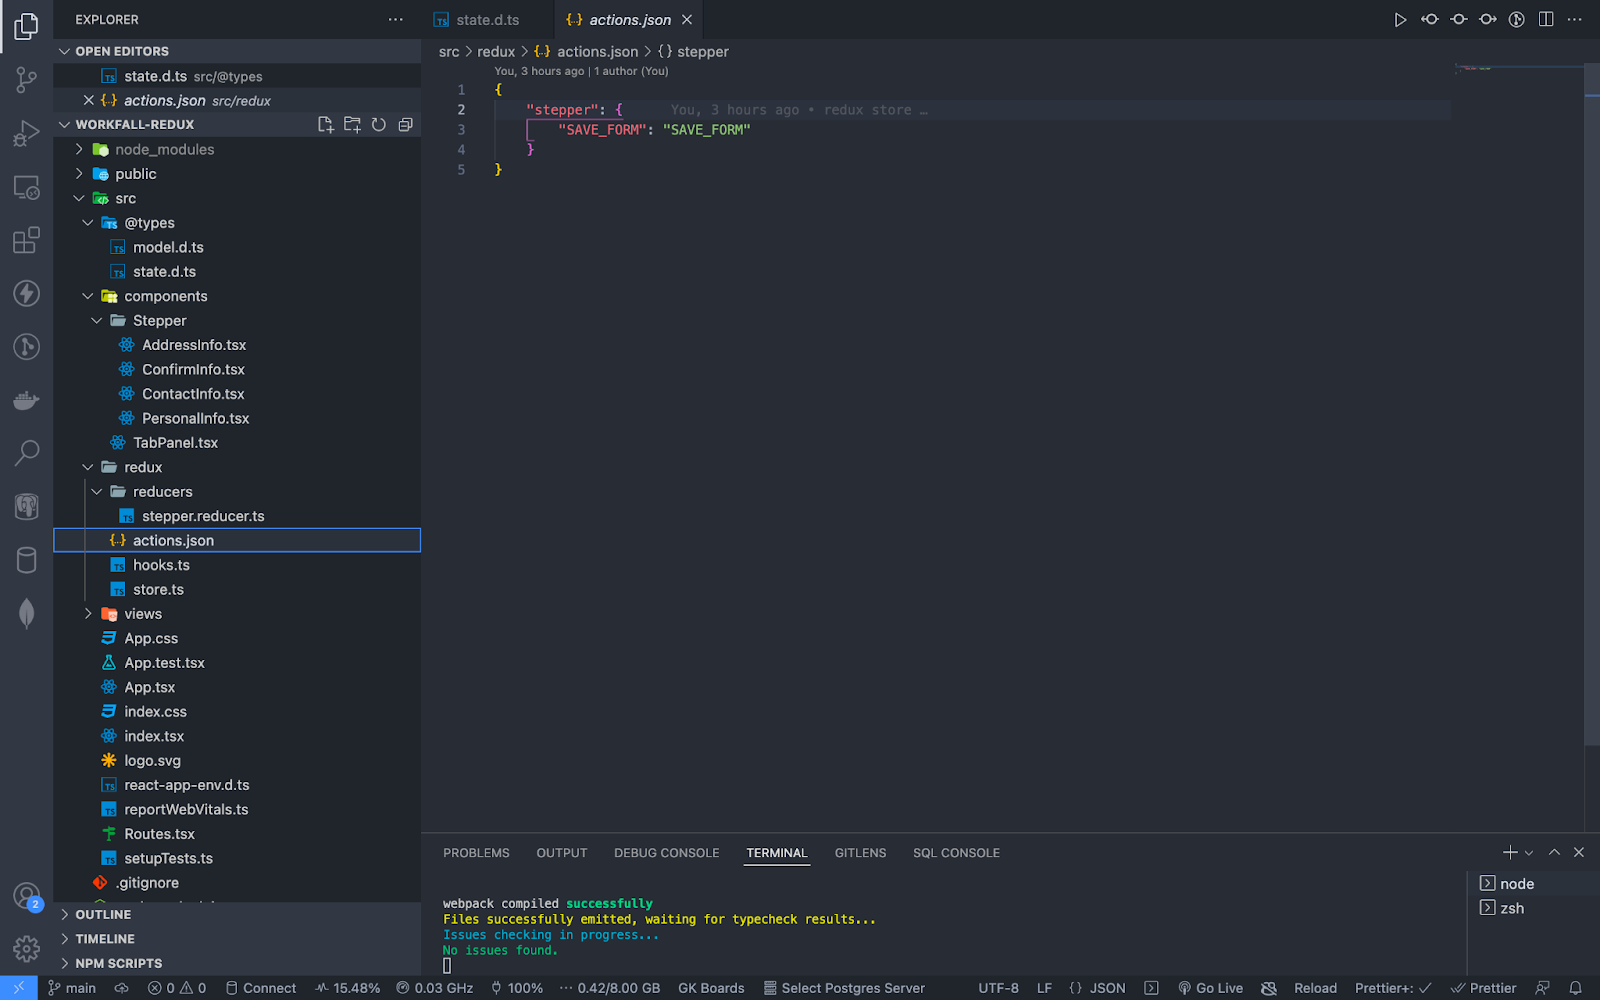
actions.json:
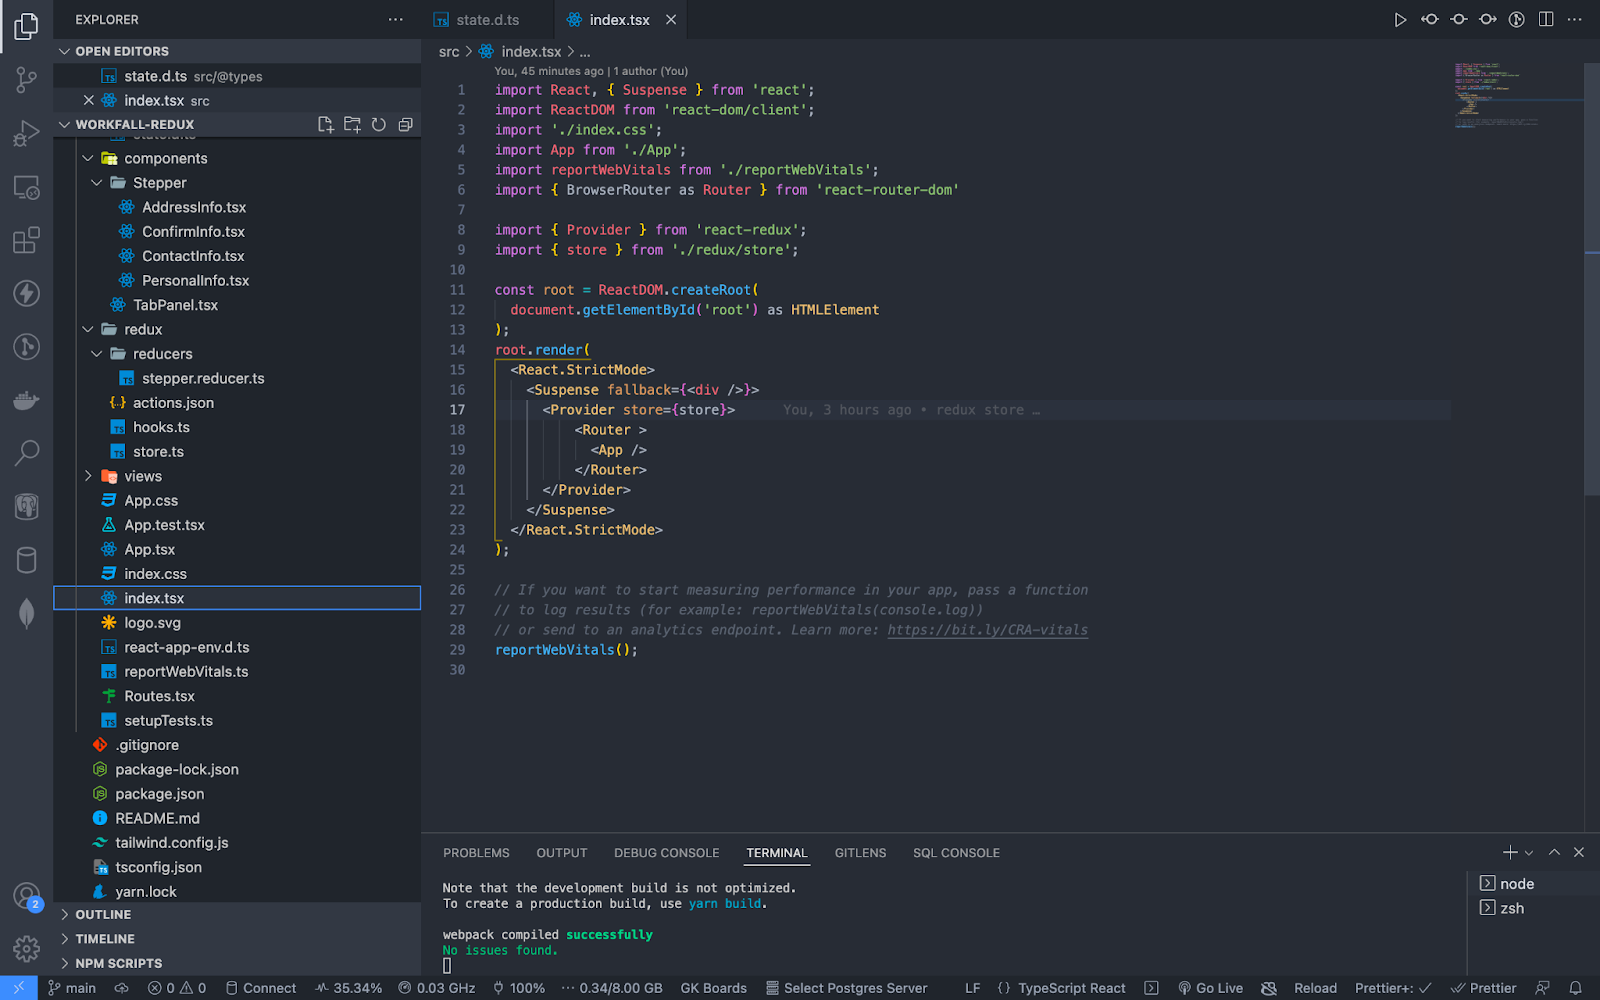
index.tsx:
Using the store as the source of truth
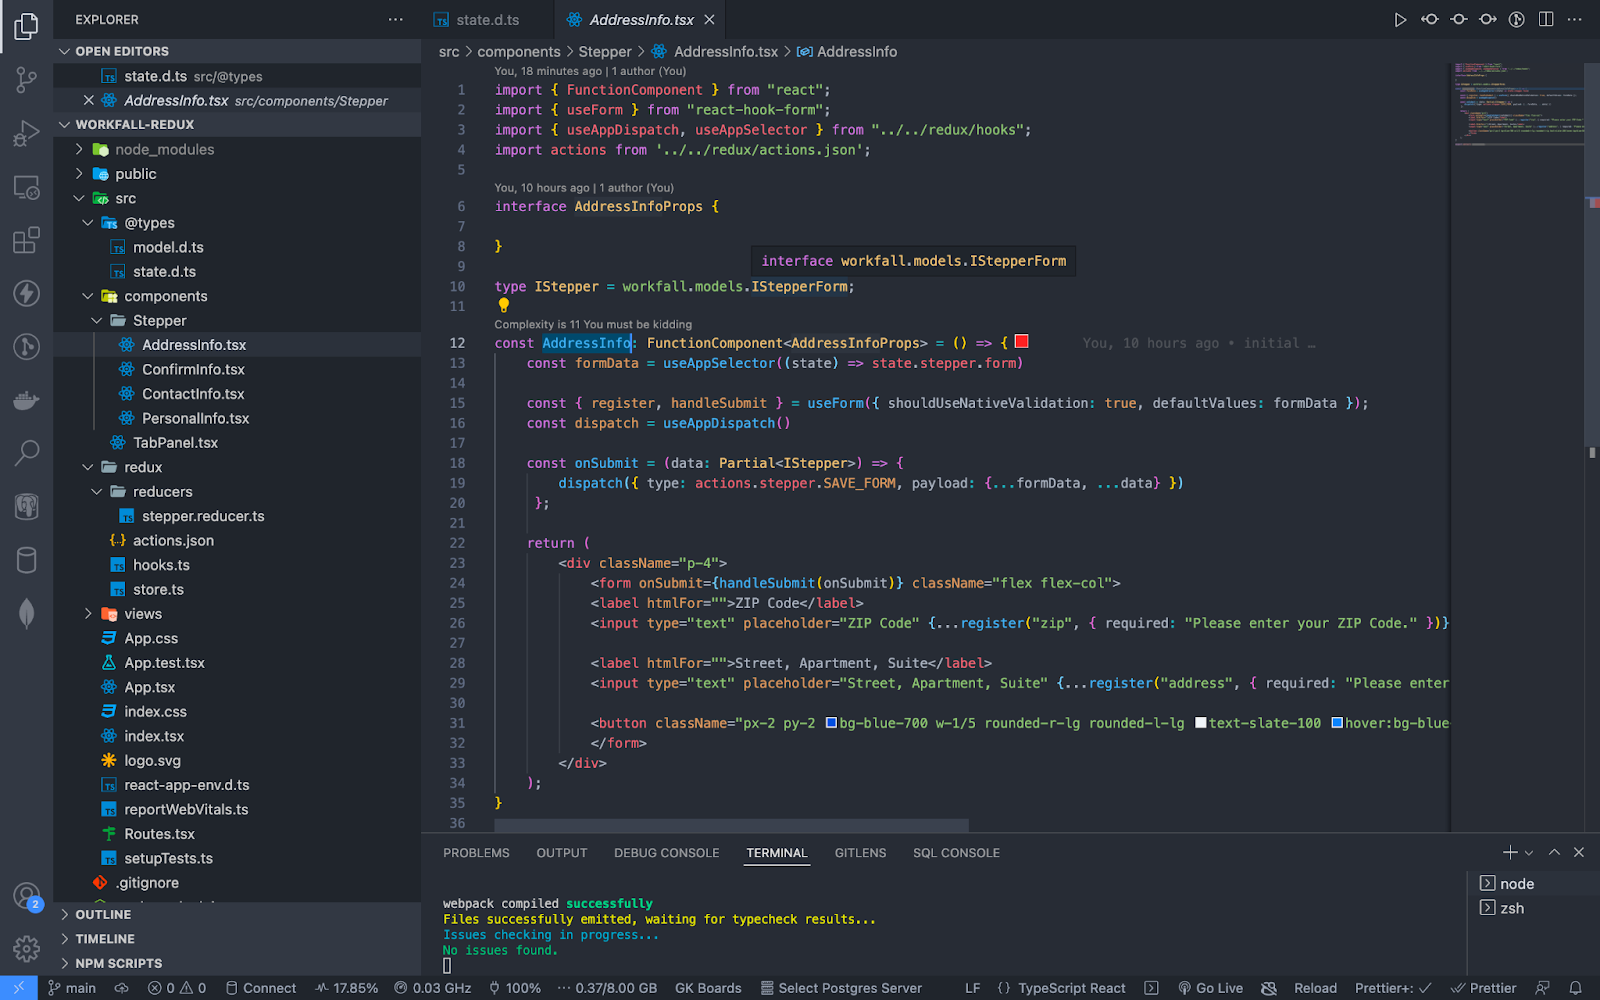
In our stepper components, we shall write our forms using the useForm library. When the component is initialized we shall fetch the form data from the store using the useAppSelector hook and use them as default values just in case the user had made some entries.
When the user clicks save we shall dispatch the SAVE_FORM action to enable the reducer to update the state.
PersonalInfo.tsx:

ContactInfo.tsx:

AddressInfo.tsx:
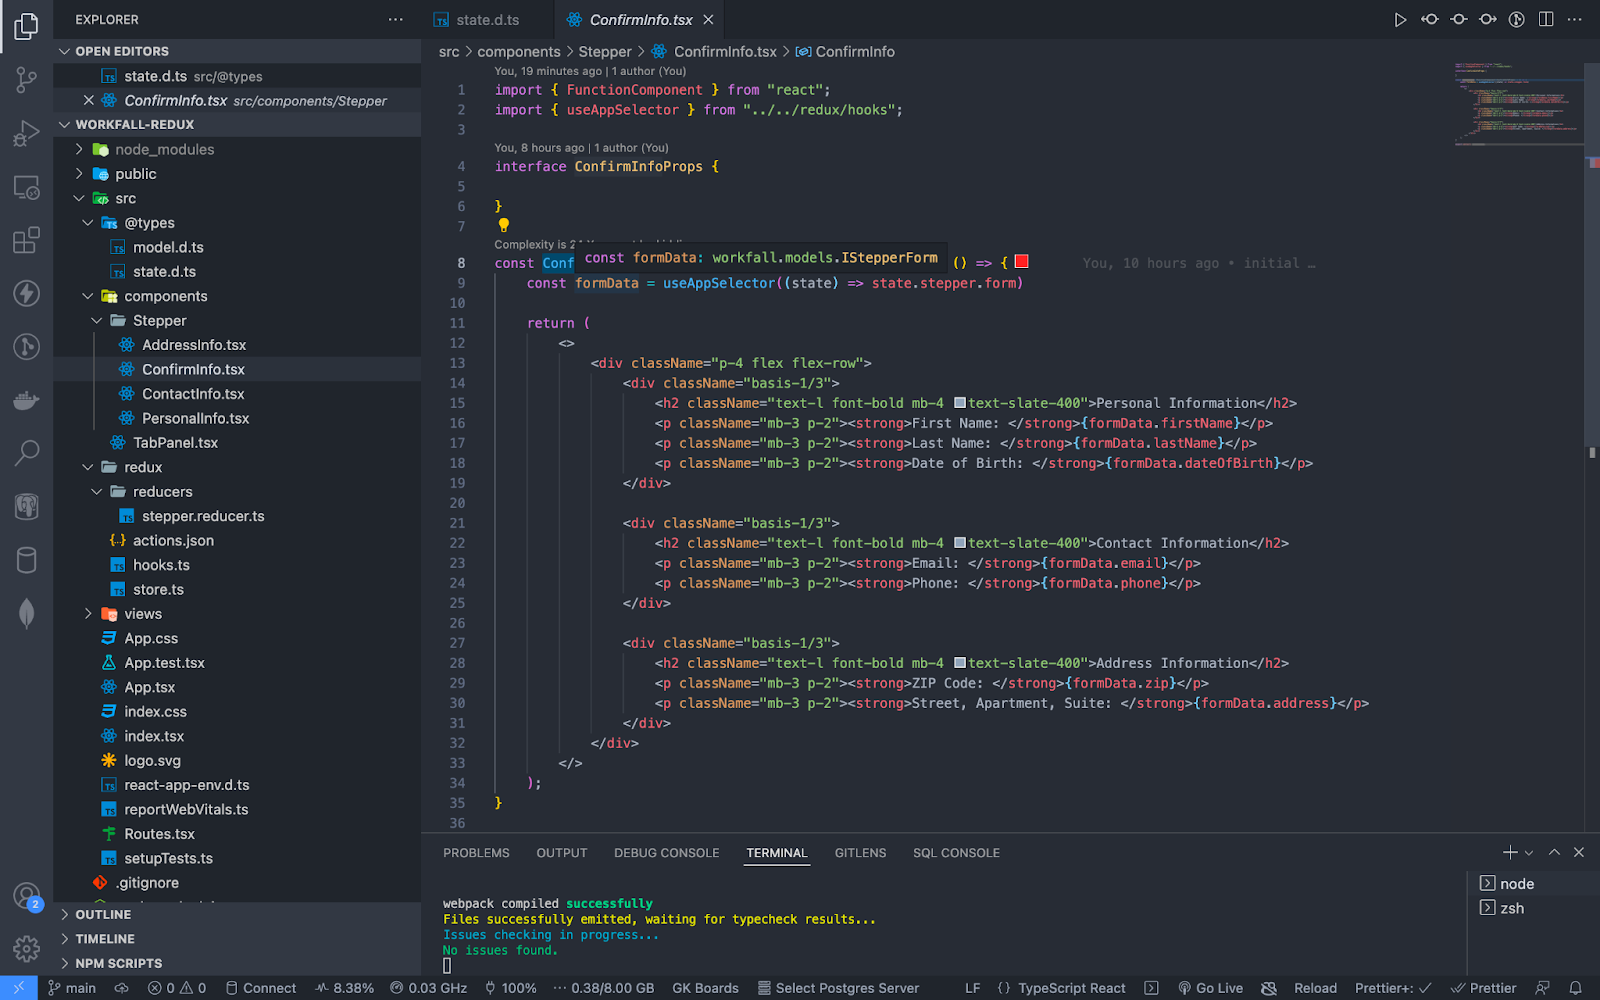
ConfirmInfo.tsx:
Conclusion
In this blog, we have demonstrated how to use Redux to manage the state of a simple stepper form which consists of four lazy-loaded forms. This is just one of the scenarios where you would want to use a state management library like Redux i.e. when you have several components that share the same data and you want to avoid unnecessary prop drilling. Whereby prop drilling refers to passing the state as props through a common parent component in a component hierarchy, which just makes your code bloated and unoptimized.
Another consideration to make when choosing to use Redux is when you are making too many API calls for the same data in different components. Especially if you are incurring charges per API call. You would want to manage those costs by making a single API call and sharing that data throughout your application using Redux.
Lastly, the code used in this blog is found at https://github.com/workfall/workfall-redux.
We will come up with more such use cases in our upcoming blogs.
Meanwhile…
If you are an aspiring React Developer and want to explore more about the above topics, here are a few of our blogs for your reference:
Stay tuned to get all the updates about our upcoming blogs on the cloud and the latest technologies.
- How to Build a Hybrid App using React Native?
- How to upload large files (1GB and beyond) to AWS S3 using NestJS (backend) and ReactJS (frontend)?
Keep Exploring -> Keep Learning -> Keep Mastering
At Workfall, we strive to provide the best tech and pay opportunities to kickass coders around the world. If you’re looking to work with global clients, build cutting-edge products and make big bucks doing so, give it a shot at workfall.com/partner today!