Imagine your data as pieces of a complex puzzle scattered across different platforms and formats. Making sense of this scattered information often feels like solving a gigantic puzzle blindfolded. This is where the power of data integration comes into play. If you’ve ever wished for a simplified way to seamlessly connect these puzzle pieces, then you’re in for a treat. Meet Airbyte, the data magician that turns integration complexities into child’s play. In this digital era, businesses thrive on data, and making this data dance harmoniously with your analytics tools is crucial.
Pair this with Snowflake, the cloud data warehouse that acts as a vault for your insights, and you have a recipe for data-driven success. In this blog, we’re diving into the world of data integration with Airbyte, unraveling the mystery behind its simplicity, and uncovering how it seamlessly connects with Snowflake to transform your data into actionable insights. Get ready to explore the realm where data dreams become reality!
In this blog, we will cover:
- What is Airbyte?
- Benefits of Airbyte
- Best Practices for Using Airbyte with Snowflake
- 5 Real-world Use Cases for Using Airbyte with Snowflake
- Hands-On
- Conclusion
What is Airbyte?
Airbyte is an open-source data integration platform that allows you to collect and move data from various sources to a destination of your choice. It simplifies the process of extracting, transforming, and loading (ETL) data by providing connectors for a wide range of data sources and destinations.
Whether you need to integrate data from databases, APIs, cloud services, or other systems, Airbyte provides the tools to make it easier and more efficient. It’s designed to be user-friendly, customizable, and extensible, making it a valuable tool for data engineers, analysts, and data-driven organizations looking to streamline their data pipelines.
Benefits of Airbyte
- Simplifying Data Integration: Imagine trying to piece together a massive puzzle with mismatched fragments – that’s what integrating data from various sources can feel like. Airbyte swoops in as the puzzle master, effortlessly connecting these fragments and transforming them into a cohesive picture.
- The Data Bridge: Think of Airbyte as a virtual bridge that links all your data sources, whether they’re databases, spreadsheets, or even applications you use every day. It’s like having a conductor that orchestrates the flow of information, ensuring that data reaches its destination flawlessly.
- User-Friendly Magic: One of Airbyte’s most enchanting qualities is its simplicity. You don’t need to possess intricate coding skills or IT expertise. With its drag-and-drop interface, creating data pipelines becomes as easy as arranging blocks in a puzzle. This means that business owners, analysts, and even beginners can wield its power without a steep learning curve.
- Multilingual Data Translator: Airbyte is like a linguistic prodigy fluent in the tongues of various data systems. It breaks down the barriers between systems that speak different languages – SQL, APIs, JSON, and more. This means your data can flow smoothly from its source, through Airbyte’s translation prowess, and into its destination without communication hiccups.
- Empowering Data-Driven Decisions: Whether you run a small online store or oversee a multinational corporation, the insights hidden in your data are priceless. Airbyte ensures that you don’t miss out on those insights due to tangled data integration processes. It transforms raw data into actionable insights, allowing you to make informed decisions that drive your business forward.
- No More Integration Nightmares: Remember the days when data integration seemed like an endless maze? With Airbyte, those nightmares become distant memories. Its streamlined approach frees you from wrestling with complex codes and convoluted processes, letting you focus on what truly matters – deriving value from your data.
- Evolving for All: As your business evolves, so does Airbyte. It’s designed to accommodate growth, scaling seamlessly as your data needs expand. Whether you’re dealing with a trickle or a deluge of data, Airbyte ensures that your integration remains robust and efficient.
Best Practices for Using Airbyte with Snowflake
- Plan for Data Integration Success: Before diving into the integration process, take a moment to strategize. Define the specific data sources you want to integrate with Snowflake and outline the objectives. Understand the types of data, their formats, and how they relate to each other. Having a clear roadmap in place sets the stage for a successful integration journey.
- Thoughtful Timing for Data Sync: Timing is crucial when it comes to data synchronization. Plan your sync operations during off-peak hours to avoid overloading the system during high-traffic periods. This not only ensures smoother data transfer but also minimizes disruption to ongoing operations.
- Streamline Data Volume for Efficiency: While Snowflake is capable of handling large datasets, it’s essential to be mindful of data volume. Focus on sending relevant, necessary data to Snowflake to prevent overwhelming the integration process. Pre-filter and pre-aggregate data at the source level to optimize the data pipeline’s efficiency.
- Adapt to Changing Data Schemas: Data sources aren’t static; they evolve. Design your integration pipelines with flexibility in mind. Account for potential changes in data schemas and structures. Incorporate dynamic mapping and transformation capabilities in Airbyte to gracefully handle schema changes without disrupting the entire pipeline.
- Refine Data Before It’s Loaded: Raw data may require adjustments to align with Snowflake’s structure and requirements. Leverage Airbyte’s transformation capabilities to refine data quality and format. Implement necessary data type conversions, filtering, and cleaning processes to ensure the data loaded into Snowflake is accurate and coherent.
5 Real-world Use Cases for Using Airbyte with Snowflake

- E-commerce Optimization: Imagine an e-commerce platform aiming to enhance customer experiences. By integrating customer data from various sources, like website behavior, purchase history, and social media interactions, into Snowflake using Airbyte, businesses can analyze this consolidated data. They can personalize recommendations, tailor marketing strategies, and improve inventory management, ultimately boosting sales and customer satisfaction.
- Financial Insights: In the financial sector, staying on top of market trends is crucial. Airbyte can collect data from diverse financial sources such as stock market feeds, economic indicators, and customer transactions. When this data is integrated into Snowflake, financial analysts gain a comprehensive view. They can predict market movements, identify investment opportunities, and make informed decisions that drive growth.
- Healthcare Data Aggregation: In healthcare, patient data is scattered across systems. Airbyte can gather patient records, test results, and treatment histories from various sources. Integrating this data into Snowflake enables medical professionals to create comprehensive patient profiles. They can personalize treatment plans, improve diagnosis accuracy, and enhance patient outcomes.
- Marketing Analytics: Marketers rely on data to refine strategies. With Airbyte, data from social media platforms, ad campaigns, and website analytics can be harmoniously integrated into Snowflake. This consolidated data reveals insights about campaign performance, audience behavior, and ROI. Marketers can optimize campaigns, allocate budgets effectively, and tailor content for better engagement.
- Supply Chain Visibility: Supply chains involve complex networks. Airbyte can sync data from suppliers, manufacturers, and distributors into Snowflake. This integration provides a holistic view of the supply chain. Companies can predict demand, streamline inventory management, and respond swiftly to disruptions.
Hands-On

In this blog, we will do a step-by-step implementation on how to effortlessly link Airbyte with Snowflake to unlock the true potential of your data.
Installing and Setting Up Airbyte
Depending on your choice, follow the instructions to download and install Airbyte on your system. It’s as easy as installing an app on your phone.
- Download Docker Desktop from here as a prerequisite.

- Deploy Airbyte
Go to airbyte documentation and run commands. Clone the repo: git clone https://github.com/airbytehq/airbyte.git.

- Run the docker Image
Change into the Airbyte directory “cd airbyte” and run the command: “./run-ab-platform.sh“ - You can also use Airbyte’s web UI and access the same here. After setting up Airbyte, you would see the UI as something like this.

- Connect Data Sources: Think of data sources like puzzle pieces – Airbyte helps you fit them together effortlessly. Click on ‘Add Source’ and choose from a wide array of sources, whether it’s a database, a file, or a cloud application.
- Follow the Prompts: Airbyte guides you through the setup for each source. It might ask for credentials, connection details, or other specifics. Don’t worry; it’s just like answering simple questions.
Creating Data Pipelines in Airbyte
Creating data pipelines in Airbyte is like crafting a virtual conveyor belt for your data, moving it seamlessly from source to destination. Follow these straightforward steps to design your data journey:
Start with a Clean Slate: After setting up Airbyte, log in to its user-friendly interface. You’ll find yourself on a dashboard that’s your workspace for creating pipelines.
Select Your Source: Click on the ‘Create New Connection’ button. This is where you choose the source of your data – it could be a database, cloud service, or even a simple spreadsheet.
Connection Details: Provide the necessary connection details. Airbyte makes it simple by asking for information like usernames, passwords, and addresses – just like you’d enter an address into a GPS.
In this demo, we are going to create a Google Sheets connection and load this data to Snowflake.

Here, we would try to insert titanic_test Google sheet onto Snowflake.

Test the Connection: Airbyte is like your trusty assistant – it double-checks everything for you. It’ll run a test to ensure the connection to your source is solid, giving you the green light to proceed.
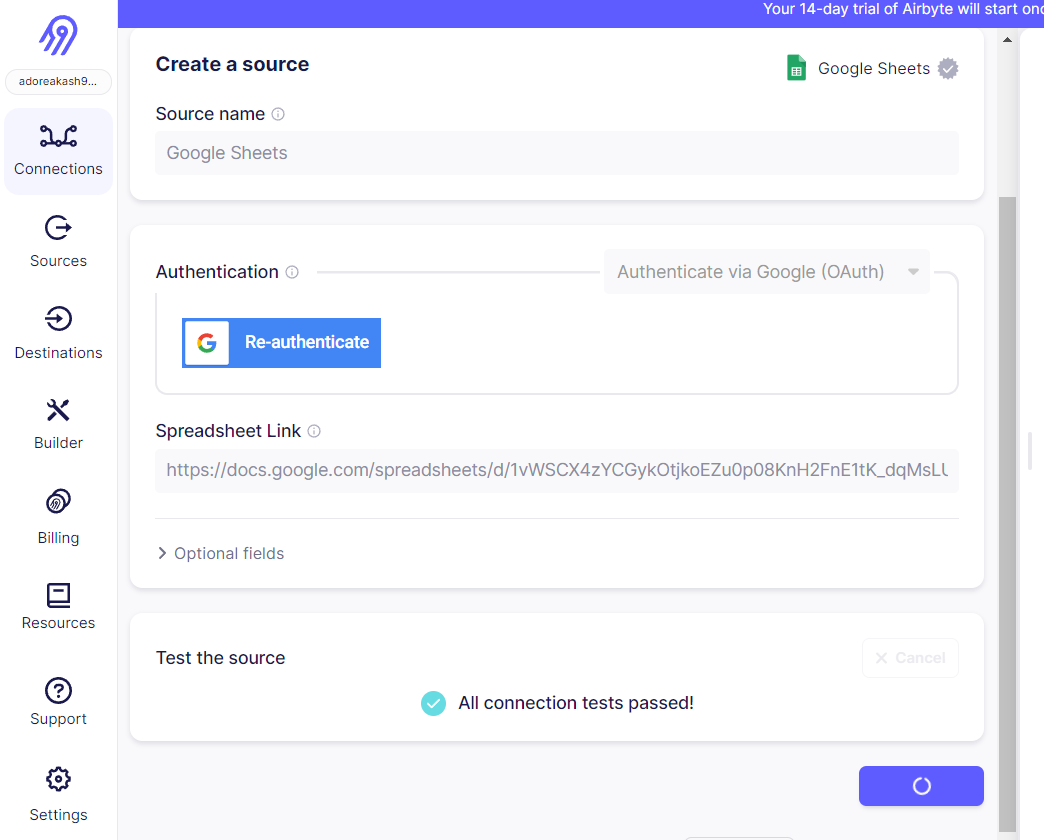
Make sure that all the tests have been passed successfully.
Select the Destination: Just as you chose a source, now pick a destination for your data. If you’re using Snowflake as your data warehouse, it’s a smart choice. Go to Select Destination Choose Snowflake and fill up the credentials.

Destination Connection Details: Similar to the source, provide the destination’s connection details. This helps Airbyte understand where your data should end up. After a successful test, you would see something like this.

Design Your Pipeline: With the source and destination set, it’s time to craft your pipeline. Airbyte’s intuitive interface allows you to map how data should flow from source to destination.
You can change the replication frequency which means how often the source should sync with the destination and explore other parameters.

Run a Test Drive: Before officially launching your pipeline, take it for a spin. Airbyte lets you run a test to see how your data travels through the pipeline, giving you a sneak peek of what to expect.
Click on the Sync Now button to sync the changes.
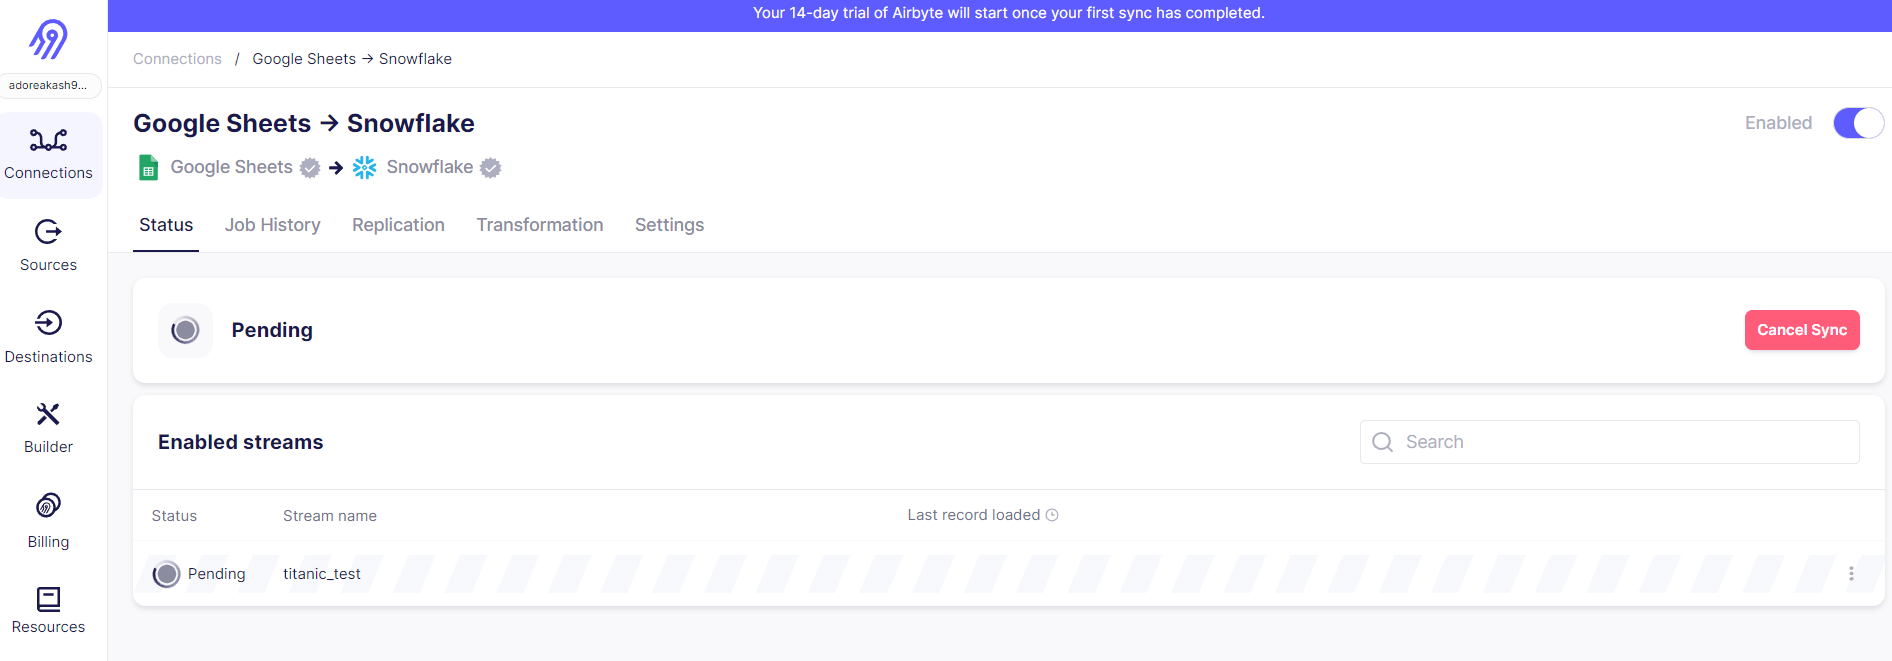
Launch the Pipeline: Once you’re satisfied with your pipeline’s design and test, it’s time to hit the launch button. Your data is now on its way, moving smoothly from the source to the destination.
After hitting the sync, you will get the success status. You can also check the Job History, Logs, etc.

Verify the load in Snowflake: Go to your schema in Snowflake and check for the data. Airbyte would create the tables all by itself and would have fresh data.

It also creates a test table to stage the data and our original table (titanic_test) without manually creating it and reduces the manual efforts. We can also add to this sheet and after 24 hours the pipeline would be running and the data would automatically be synced to Snowflake.
Conclusion
In this blog, we seamlessly integrated Airbyte with Snowflake to unlock our data’s potential. We installed Airbyte, connected data sources, designed pipelines, and witnessed smooth data flow. With Airbyte and Snowflake, data integration is now a breeze. We will come up with more such use cases in our upcoming blogs.
Meanwhile…
If you are an aspiring Data engineer and want to explore more about the above topics, here are a few of our blogs for your reference:
- How to Simplify Data Pipelines with DBT and Airflow?
- How to Master Data Transformations with DBT Materializations?
- How to Use DBT to Get Actionable Insights from Data?
- Use SurrealDB to Persist Data with Rocket REST API
Stay tuned to get all the updates about our upcoming blogs on the cloud and the latest technologies.
Keep Exploring -> Keep Learning -> Keep Mastering
At Workfall, we strive to provide the best tech and pay opportunities to kickass coders around the world. If you’re looking to work with global clients, build cutting-edge products, and make big bucks doing so, give it a shot at workfall.com/partner today!